We are delighted to share that we went live with the new Sync module on Monday. On that occasion we did a YouTube Livestream (German) that introduced Sync and answered questions around the topic. Now here are the most important details on the new Sync module to recap. Please feel free to share this blog post with people in your church, if you think they will take an interest in this new product.
What can you do with Sync?
The Sync module allows you to connect your ChurchTools with another system, in order to share data between the two. There are a number of different actions, filters, and mapping tools at your disposal that let you decide what data points to import, export or to keep in sync. Therefore, Sync can help you and your church save time and effort, because you don’t have to manually compare and join data bases.
Here are a few examples of use:
- A church association can bundle data of pastors from there respective member churches
- You can synchronize people and later transaction data as well between your ChurchTools and Optigem
- You can import registration data from DaviP into your ChurchTools
For now the Sync supports connections with other ChurchTools installations and with Optigem. Soon, as well we will add the option to connect with the registration database DaviP for our customers using the “Kirchliches Rechenzentrum” (KRZ). And we have many ideas for additional platforms (e.g. MS Teams / Excel 365) and data types (e.g. transactions) to support. More on that at the end of this post.
How does Sync work?
If you are super admin, you can see the new Sync module by default in the menu bar up top. Everyone else who wants to work with Sync needs the permission “View and administer Sync”. Be aware that Sync is a powerful tool, and therefore, only people who have the permission to create and edit people entries in ChurchTools should have access to Sync. If you have the necessary permission, you can now navigate to Sync via the menu bar up top.
Create a connection
First, you need to create a connection to another system. At launch we support connections to ChurchTools, Optigem, and DaviP:
ChurchTools
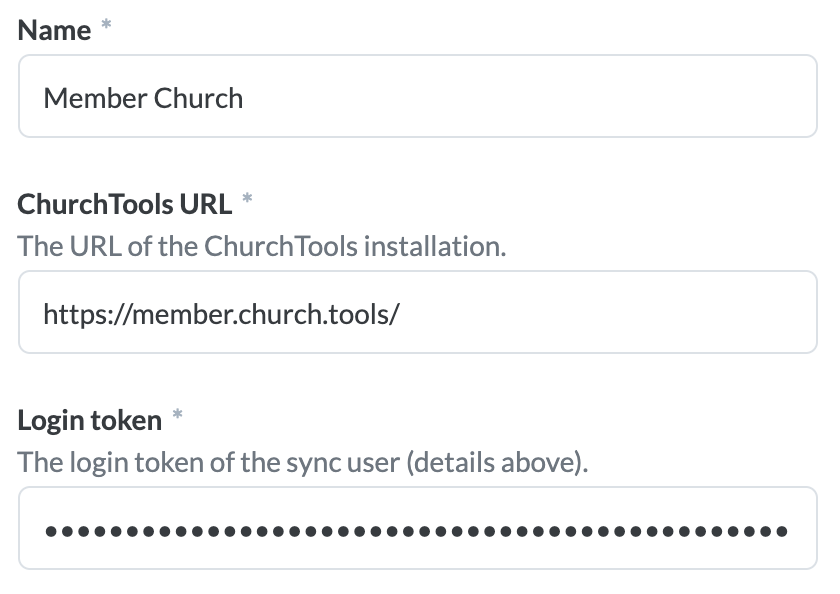
You can connect another ChurchTools installation via the login token of one of its users (e.g. “Sync User”) that needs to be created in the installation you are trying to connect with. The Sync will inherit all permissions that are granted to this user. On this help page (German) you can find more information on how to set up the “Sync User” und its permissions.
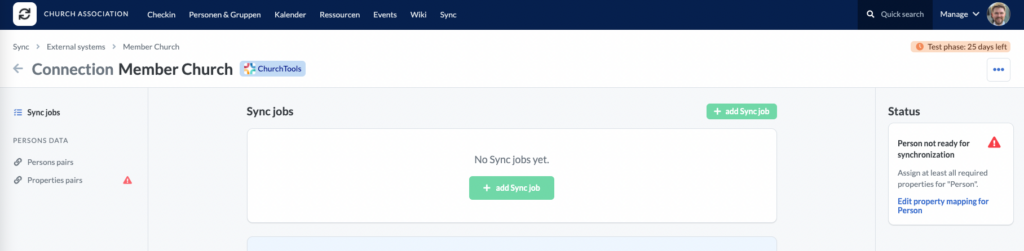
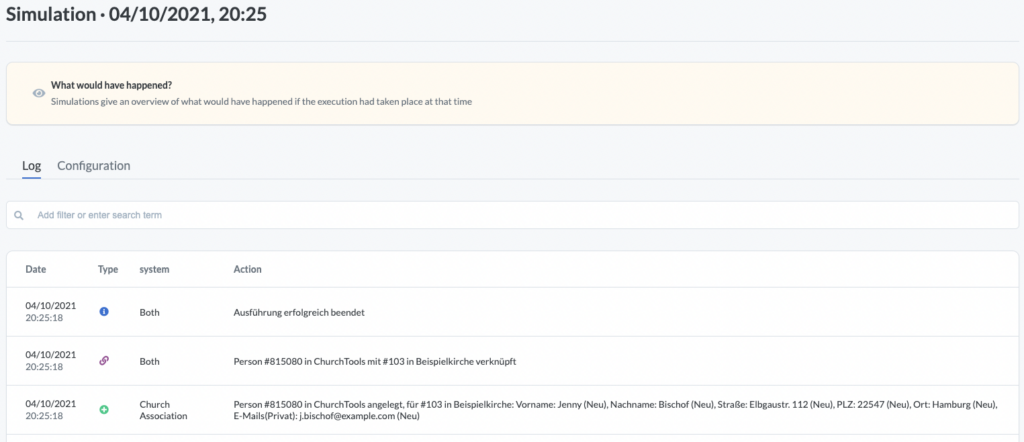
On the YouTube Livestream we walked through an example of a church association that imports/updates people data from one of its member churches. You can recap this example via this link (German). We are also using this example in the screenshots below:
Optigem
If you want to exchange data with Optigem then you can use the Windows application ChurchTools-Optigem-Configurator. First, you need to install the application on a PC with access to your Optigem data and then select Microsoft Access oder MS-SQL database where your Optigem data lives. Next, you enter your Optigem login details and receive a security key and client. With this information you start a new connection to Optigem in the Sync module.
DaviP
Soon, we will enable connections to DaviP for all customers of the “Kirchliches Rechenzentrums” (KRZ) via your DaviP login details. DaviP does not support automized data writing, therefore, you can only import data from DaviP into ChurchTools, but not the other way around.
Creating and configuring Sync jobs
Within the connection you can now create so called Sync jobs. You can configure them according to your needs, so that only selected people with specific properties (e.g. first name, last name, gender, …) will be synchronized.
Selecting actions
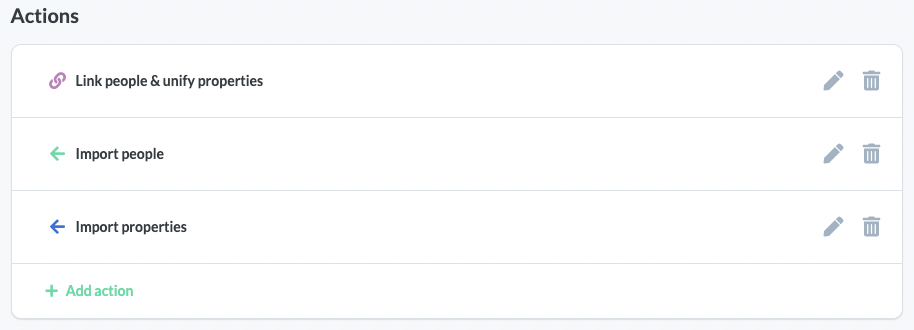
The Sync job now allows you to set up the actions that should be carried out. You have the following options to choose from (multi select possible):
- Link people and unify their properties
- Import people
- Export people
- Update properties
- Import properties
- Export properties
- Archive people
- Delete people
Actions 1. – 3. create so called people pairs when they are selected and the Sync job is executed. A people pair is a link between a person (e.g. John Doe) in your own system and the same person (e.g. John Doe) in the connected system.
Actions 4. – 8. only come into play for existing people pairs. On the overview page of the connection you can find all generated people pairs. There, you can also unlink individual (or all) people pairs.
Narrow down the group of people
Next, you set up the conditions which people from your or the other system should be included in the Sync job. For example, you can create a rule that only people in the group “church leadership” will be imported. There are detailed explanations right within ChurchTools to help you understand the impact of the conditions you set on the actions you chose.

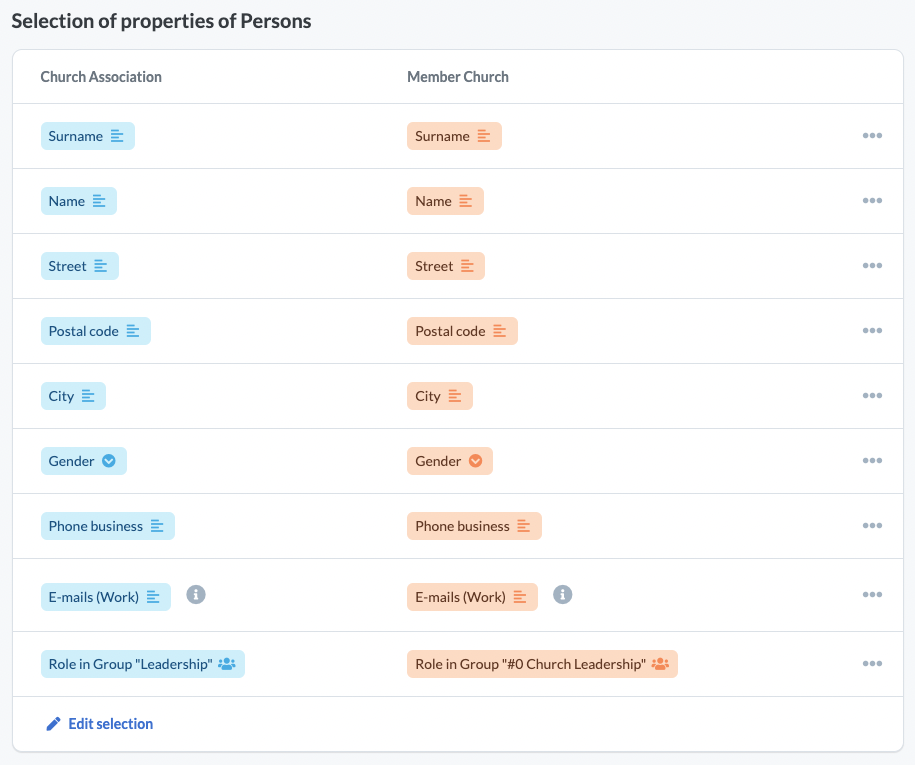
Mapping and selecting properties of people
You can map the properties from your own system with the connected system (e.g. first name <-> name) on the Sync job page or on the overview page of the connection. Important: Mapped properties (also called property pairs) are the same for all Sync jobs of this connection.
If a property has multiple values, e.g. gender: male or female, then those values have to be mapped with property values from the other system: e.g. male <-> m, female <-> f. Additionally, there is the option to define fallback value, in case that new values are added to a property later on (e.g. gender: rather not say).
Finally, you select in the Sync job which of the created property pairs should be taken into account when executing the job (e.g. only first name, last name, gender).
Status column as a guide
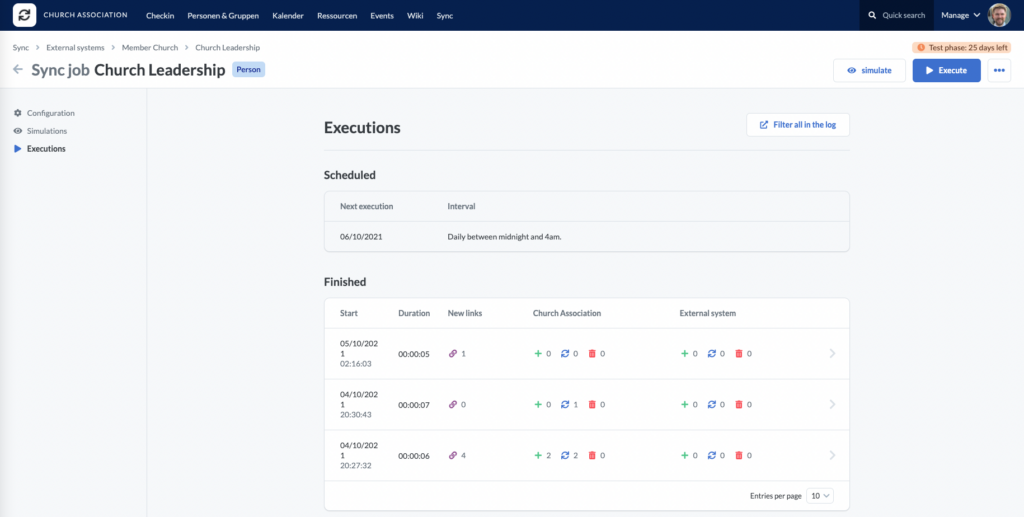
Now you are done configuring your Sync job. If there is a problem with the settings, then you will receive an error message in the status column on the right hand side. Feel free to use this to troubleshoot your Sync job if necessary. If all is set up properly you will see a green message “Ready for execution”. You can now click the buttons “Simulate” and “Execute” on the top right of your screen.
Simulate first, execute after
We recommend to always use the “Simulate” button after you set up a new Sync job. Because you’ll receive a detailed log of what would have happened if this Sync job was actually executed. If you should notice unwanted actions in the log, please adjust the Sync job configuration and simulate again. Please repeat this step until you are satisfied with the “What would happen?” results.
Now you can click “Execute” and selected actions will be carried out like you simulated them (provided that no data from selected people was changed in the meantime). In order to execute a Sync job on a regular basis (e.g. to keep two databases in Sync), please enable “Automatic executions”. When this switch is turned on, the Sync job will be automatically processed once every night between 12AM and 4AM.
Who can use Sync?
Sync is currently only available for hosted ChurchTools installations. If you host your ChurchTools on your own server, you cannot use Sync unfortunately.
How much does Sync cost?
You can test Sync 30 days for free. After that, you need a licence in order to execute the number of Sync jobs that you need. One Sync job starts in the S-package from 4€/month. An unlimited amount of Sync jobs costs 49€/month. All Sync jobs have unlimited executions. You can find all other prices on our website or in your ChurchTools under Manage > Admin-Settings > Licence.
What does the future hold for Sync?
Of course, we want to develop the Sync even further, so that it brings maximum time savings to you and your church. Therefore, we want to encourage you to answer two quick questions: Sync survey (German)
The results of this survey will help us to determine which platform and data types to support next. Thanks a lot for your feedback!
And also, thanks for reading this entire blog post. Enjoy syncing!